Slime Filled Halloween Cookies
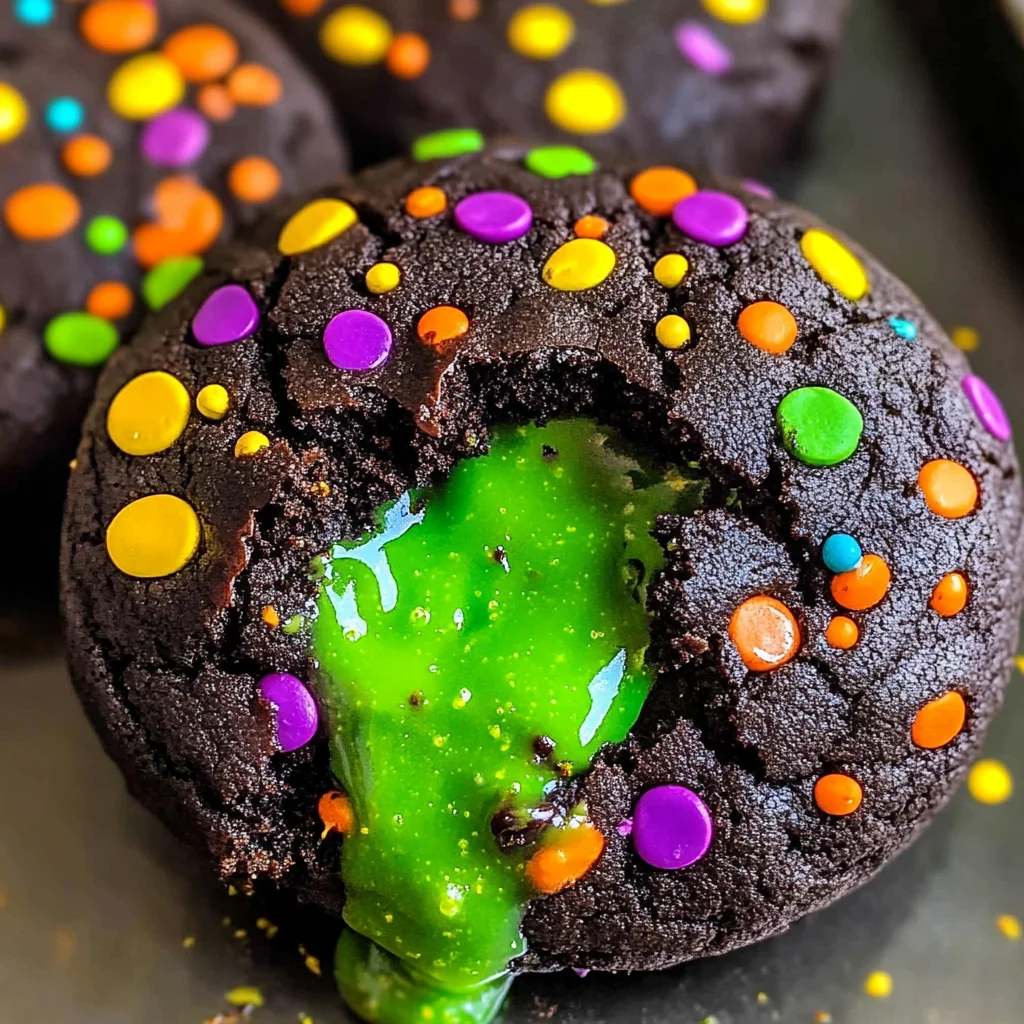
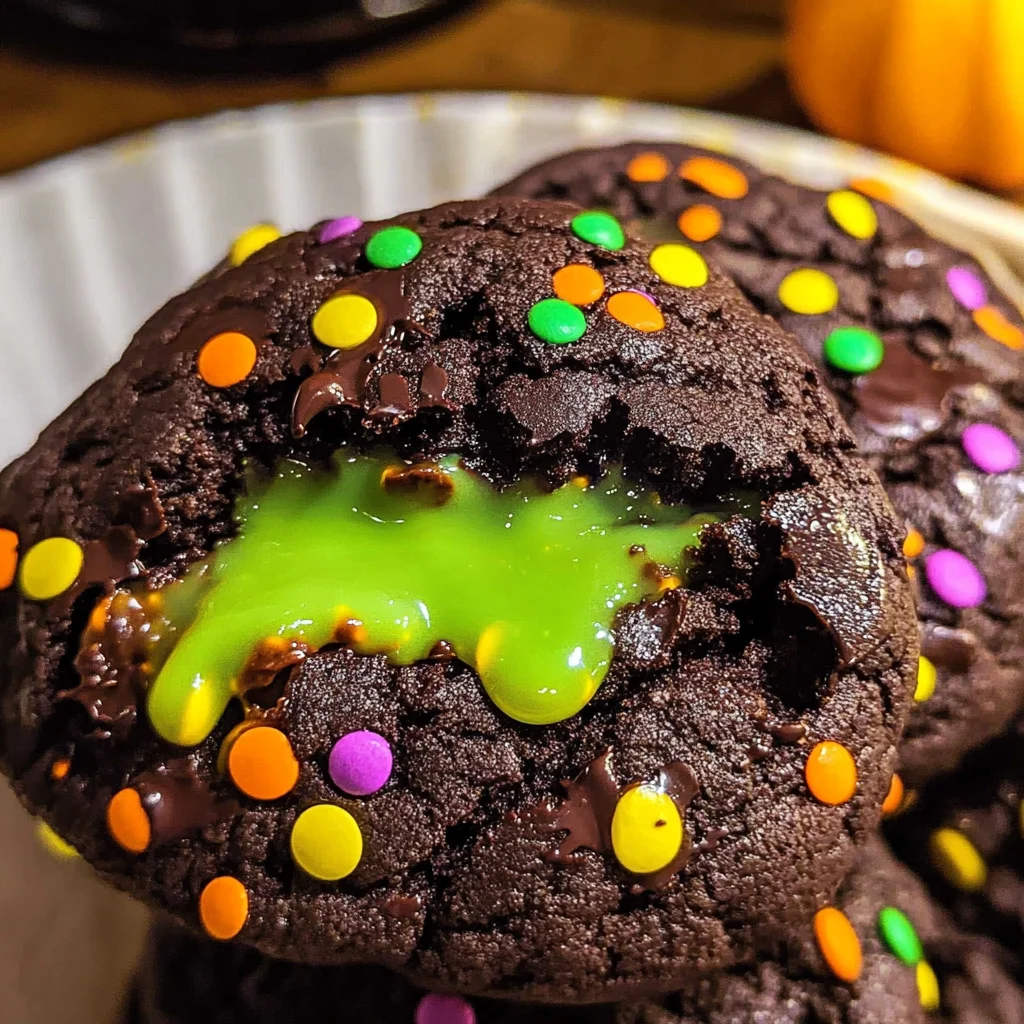
If you’re looking for a fun and spooky treat to impress your friends and family this Halloween, you’ve come to the right place! These Slime Filled Halloween Cookies are not just any cookies; they are rich, dark chocolate delights with a surprise creamy slime center that will make everyone smile. This recipe has become a beloved favorite in my home because it brings the magic of Halloween right into our kitchen. Perfect for busy weeknights or family gatherings, these cookies add a splash of excitement to any occasion!
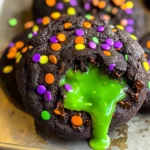
Imagine hosting a Halloween party and watching as your guests take that first bite, only to discover the gooey green filling inside. It’s sure to be the highlight of your dessert table! Let’s dive into why you’ll absolutely love making these cookies.
Why You’ll Love This Recipe
- Easy to Make: With simple steps and common ingredients, even novice bakers can whip these up with confidence.
- Family-Friendly Fun: Kids will love helping out in the kitchen, especially when it comes to mixing the slime!
- Perfect for Any Occasion: Whether it’s Halloween or just an ordinary day, these cookies bring joy year-round.
- Deliciously Decadent: The combination of dark chocolate and creamy filling creates an irresistible flavor that will have everyone coming back for more.
Ingredients You’ll Need
These Slime Filled Halloween Cookies require just a handful of simple and wholesome ingredients that you might already have in your pantry. Let’s gather everything we need for this spooky treat!
For the Cookie Dough
- 4 ounces cream cheese (softened)
- 2 cups confectioners sugar
- 1 ½ Tablespoons all-purpose flour
- 1 teaspoon vanilla extract
- neon green food coloring
- ½ cup salted butter (room temperature)
- ½ cup light brown sugar (packed)
- ½ cup granulated sugar
- 1 large egg (room temperature)
- 1 Tablespoon milk
- 1 teaspoon baking soda
- 2 teaspoons vanilla extract
- ¼ cup dark chocolate cocoa powder (or black)
- black gel food coloring
- 1 ⅔ cups all-purpose flour
- Halloween sprinkles
Variations
This recipe is wonderfully flexible, allowing you to get creative with flavors and decorations. Here are some fun ideas to switch things up:
- Try Different Colors: Use other food colorings like orange or purple for the slime center to match different themes.
- Add Some Crunch: Mix in some chopped nuts or crushed cookies into the dough for added texture.
- Get Creative with Shapes: Use Halloween-themed cookie cutters to shape your cookies instead of traditional rounds.
- Switch Up the Sprinkles: Experiment with various themed sprinkles on top for extra flair—think ghosts or bats!
How to Make Slime Filled Halloween Cookies
Step 1: Prepare the Cookie Dough
Start by preheating your oven to 350°F (175°C). In a large mixing bowl, cream together the softened butter, light brown sugar, and granulated sugar until light and fluffy. This step is crucial as it incorporates air into the mixture, resulting in a lighter cookie. Next, add in your egg and vanilla extract, blending them well before incorporating the dry ingredients.
Step 2: Create the Slime Filling
In another bowl, beat together softened cream cheese, confectioners sugar, all-purpose flour, one teaspoon of vanilla extract, and enough neon green food coloring until smooth. This filling is what makes these cookies so special! It’s both creamy and vibrant—just like any good Halloween treat should be.
Step 3: Form the Cookies
Now it’s time to assemble! Take a small amount of cookie dough and flatten it in your palm. Place about a teaspoon of your slime filling in the center before wrapping the dough around it. Make sure it’s sealed well so that no filling escapes during baking. Roll each cookie into balls and place them on lined baking sheets.
Step 4: Bake & Decorate
Bake your cookies in the preheated oven for about 12-15 minutes or until they look slightly set but still soft. Keep an eye on them; overbaking can lead to dry cookies! Once they’re out of the oven and cooled slightly, drizzle some black gel food coloring on top and sprinkle with Halloween sprinkles for that final festive touch.
Now you’re ready to share these delightful Slime Filled Halloween Cookies with friends and family! Enjoy every spooky bite!
Pro Tips for Making Slime Filled Halloween Cookies
Baking these spooky cookies should be a fun experience, so here are some tips to ensure your slime-filled creations turn out perfectly every time!
-
Use softened cream cheese: This helps create a smooth and creamy filling that blends well with the confectioners’ sugar, making the slime texture just right.
-
Chill the dough: If you find the cookie dough too sticky to work with, chilling it for about 30 minutes can make it easier to handle and shape. It also helps the cookies maintain their shape while baking.
-
Don’t skip the neon green food coloring: This is what gives your slime its vibrant color! Adjust the amount based on how bright you want it; a little goes a long way.
-
Take care not to overmix: When combining your cookie ingredients, mix just until combined. Overmixing can lead to tough cookies instead of soft and chewy ones.
-
Let cookies cool completely before filling: To avoid melting your delicious slime center, ensure that your cookies have cooled down fully before adding the filling.
How to Serve Slime Filled Halloween Cookies
Presenting these delightful cookies can be as fun as making them! Here are some creative ideas for serving them at your next spooky gathering.
Garnishes
- Halloween-themed sprinkles: Sprinkling extra Halloween sprinkles on top of your cookies adds a festive touch and enhances their visual appeal.
- Edible glitter: A light dusting of edible glitter can make your cookies sparkle, giving them a magical look that’s perfect for Halloween parties.
Side Dishes
- Pumpkin spice latte: The warm spices in this popular drink complement the rich chocolate flavor of the cookies beautifully, creating a cozy dessert experience.
- Apple cider: This sweet and tangy beverage pairs wonderfully with chocolate and adds an autumnal touch that resonates with Halloween festivities.
- Caramel popcorn: The crunchiness and sweetness of caramel popcorn provide a delightful contrast to the soft texture of the cookies, making for an exciting snack combination.
- Cheese platter: A selection of cheeses like brie or cheddar can balance out the sweetness of the cookies while offering guests a savory option to enjoy alongside their treats.
Enjoy your Slime Filled Halloween Cookies with these serving suggestions, and watch as they become the star of any Halloween gathering! Happy baking!
Make Ahead and Storage
These Slime Filled Halloween Cookies are perfect for meal prep, making it easy to get a jump start on your spooky celebrations. You can prepare the slime filling and cookie dough ahead of time, ensuring that you have delicious treats ready to go when the mood strikes!
Storing Leftovers
- Store leftover cookies in an airtight container at room temperature for up to 3 days.
- If you prefer them chilled, place them in the refrigerator where they can last up to a week.
Freezing
- To freeze the cookies, allow them to cool completely before placing them in a single layer on a baking sheet.
- Once frozen, transfer them to an airtight container or freezer bag. They can be kept in the freezer for up to 3 months.
- For best results, thaw at room temperature before enjoying.
Reheating
- If you prefer your cookies warm, reheat them in the oven at 350°F (175°C) for about 5-10 minutes until warm.
- Microwaving is also an option; heat each cookie for about 10-15 seconds until just warmed through.
FAQs
Here are some common questions that might help you make these delightful cookies even more enjoyable!
Can I make Slime Filled Halloween Cookies without cream cheese?
Yes! You can substitute the cream cheese with a vegan cream cheese alternative or even use a dairy-free yogurt for a similar texture and flavor.
How do I achieve the perfect slime filling for my Slime Filled Halloween Cookies?
To get that perfect slime-like consistency, ensure that your cream cheese is softened and mix it thoroughly with confectioners sugar until smooth. Adding neon food coloring will give it that vibrant look!
How long do Slime Filled Halloween Cookies last?
These cookies can last up to 3 days at room temperature or up to a week if refrigerated. If frozen, they maintain their quality for about 3 months.
Can I add different colors to the slime filling?
Absolutely! Feel free to experiment with different gel food coloring shades to create unique and spooky effects for your fillings.
Final Thoughts
I hope you find joy in creating these Slime Filled Halloween Cookies! They’re not just delicious but also bring an element of surprise and fun that’s perfect for any gathering. Whether you’re celebrating Halloween or simply want to treat yourself or loved ones, these cookies are sure to be a hit. Enjoy every bite and happy baking!
Slime Filled Halloween Cookies
Delight in these Slime Filled Halloween Cookies with a creamy surprise inside. Perfect for spooky celebrations—try making them today!
- Prep Time: 20 minutes
- Cook Time: 15 minutes
- Total Time: 35 minutes
- Yield: Approximately 24 cookies 1x
- Category: Dessert
- Method: Baking
- Cuisine: American
Ingredients
- 4 ounces softened cream cheese
- 2 cups confectioners sugar
- ½ cup salted butter (room temperature)
- 1 large egg (room temperature)
- ¼ cup dark chocolate cocoa powder
- 1 ⅔ cups all-purpose flour
- Neon green food coloring
- Halloween sprinkles
Instructions
- Preheat oven to 350°F (175°C). In a mixing bowl, cream together softened butter, light brown sugar, and granulated sugar until fluffy. Add the egg and vanilla extract; mix well.
- Gradually add flour, cocoa powder, and baking soda until combined.
- For the slime filling, beat together cream cheese, confectioners sugar, flour, vanilla extract, and neon green food coloring until smooth.
- Form cookie dough into small discs; place a teaspoon of slime filling in the center and seal tightly. Roll into balls and place on baking sheets.
- Bake for 12-15 minutes until set but soft. Let cool slightly before decorating with black gel food coloring and sprinkles.
Nutrition
- Serving Size: 1 serving
- Calories: 180
- Sugar: 12g
- Sodium: 90mg
- Fat: 8g
- Saturated Fat: 5g
- Unsaturated Fat: 3g
- Trans Fat: 0g
- Carbohydrates: 25g
- Fiber: 1g
- Protein: 2g
- Cholesterol: 25mg