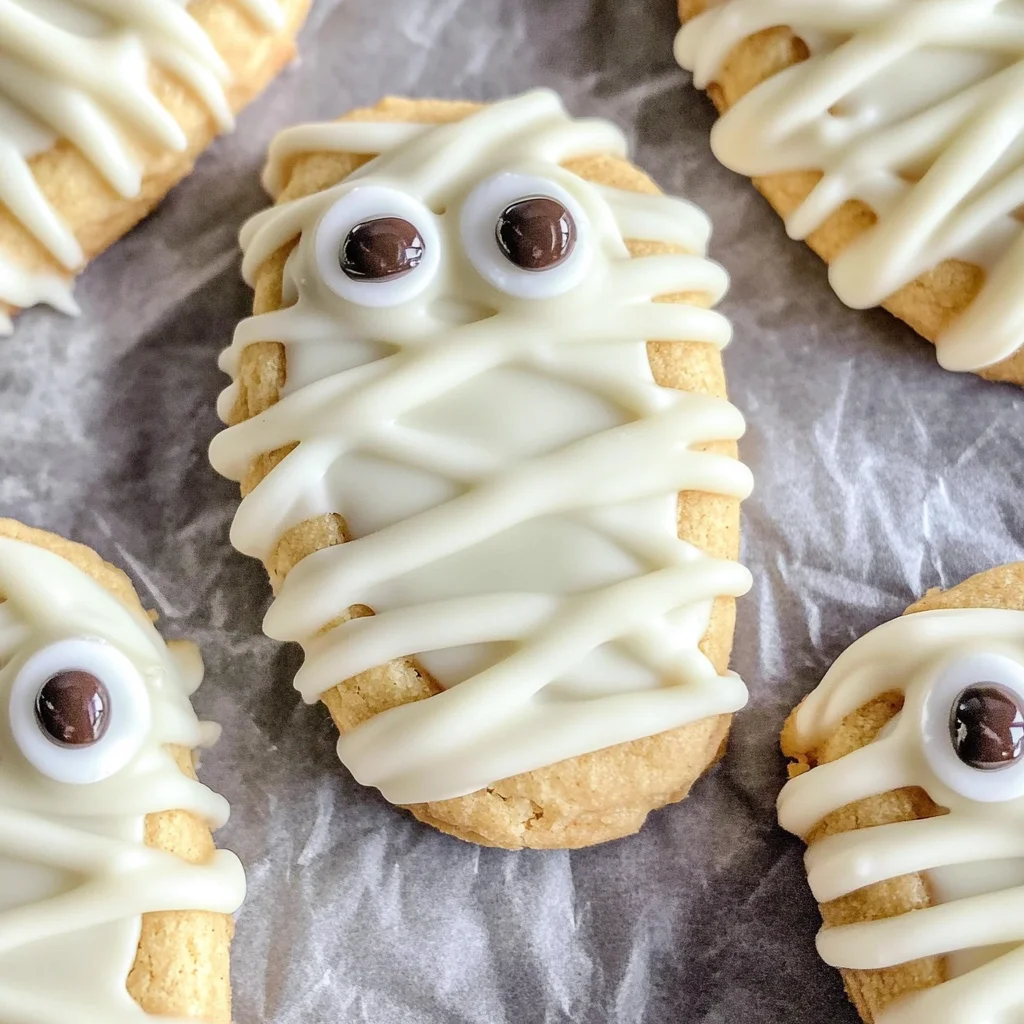
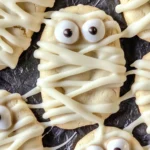
Nutter Butter Mummies
If you’re looking for a fun and delightful treat to celebrate Halloween or just to brighten up a regular day, then Nutter Butter Mummies are the perfect choice! These adorable cookies not only look amazing, but they’re also incredibly simple to whip up. Imagine the smiles on your family’s faces when they see these cute little mummies staring back at them. Whether it’s a busy weeknight or a festive gathering, this recipe is sure to be a hit!
What I love most about Nutter Butter Mummies is how quickly you can make them. With just a few ingredients and minimal prep time, you can create something that’s both delicious and visually appealing. Plus, they’re a fantastic way to get the kids involved in the kitchen!
Why You’ll Love This Recipe
- Super Easy: The steps are straightforward, making this perfect for even novice bakers.
- Family-Friendly Fun: Kids will love helping out and seeing their creations come to life!
- Quick Preparation: In just 20 minutes, you can have these cute treats ready to enjoy.
- Versatile Treats: You can customize them with different toppings or even turn them into popsicle sticks!
- Perfect for Any Occasion: Whether it’s Halloween or just a fun snack, these mummies fit right in.
Ingredients You’ll Need
Making Nutter Butter Mummies is all about using simple and wholesome ingredients. Here’s what you’ll need to get started:
For the Mummies
- 8 Nutter Butter Cookies
- 1 (12 oz) bag White Chocolate Chips
- 16 Candy Eyes
Variations
This recipe is wonderfully flexible! If you’re feeling creative or want to switch things up, here are some fun variations to try:
- Add Colorful Sprinkles: Give your mummies some flair by adding sprinkles on top of the melted chocolate before it hardens.
- Use Dark Chocolate: For a richer flavor, swap out white chocolate for dark chocolate chips.
- Try Different Candies: Use mini chocolate chips instead of candy eyes for a spooky twist!
- Make It A Pop: Insert popsicle sticks into the cookies before dipping them for an easy-to-eat treat.
How to Make Nutter Butter Mummies
Step 1: Prepare Your Workspace
Lay parchment paper on your countertop. This will keep your cookies from sticking and make cleanup a breeze. A clean workspace sets the stage for creativity!
Step 2: Melt the Chocolate
In a small microwave-safe bowl, melt the white chocolate chips. Heating them until smooth is essential because this will coat your cookies perfectly. Just remember to do it in short bursts and stir in between!
Step 3: Coat the Cookies
Dunk each Nutter Butter cookie into the melted chocolate, ensuring it’s fully coated. Tap off any excess chocolate gently on the side of the bowl—this helps create that lovely mummy look! Place each cookie on the parchment paper and immediately add two candy eyes before letting them harden.
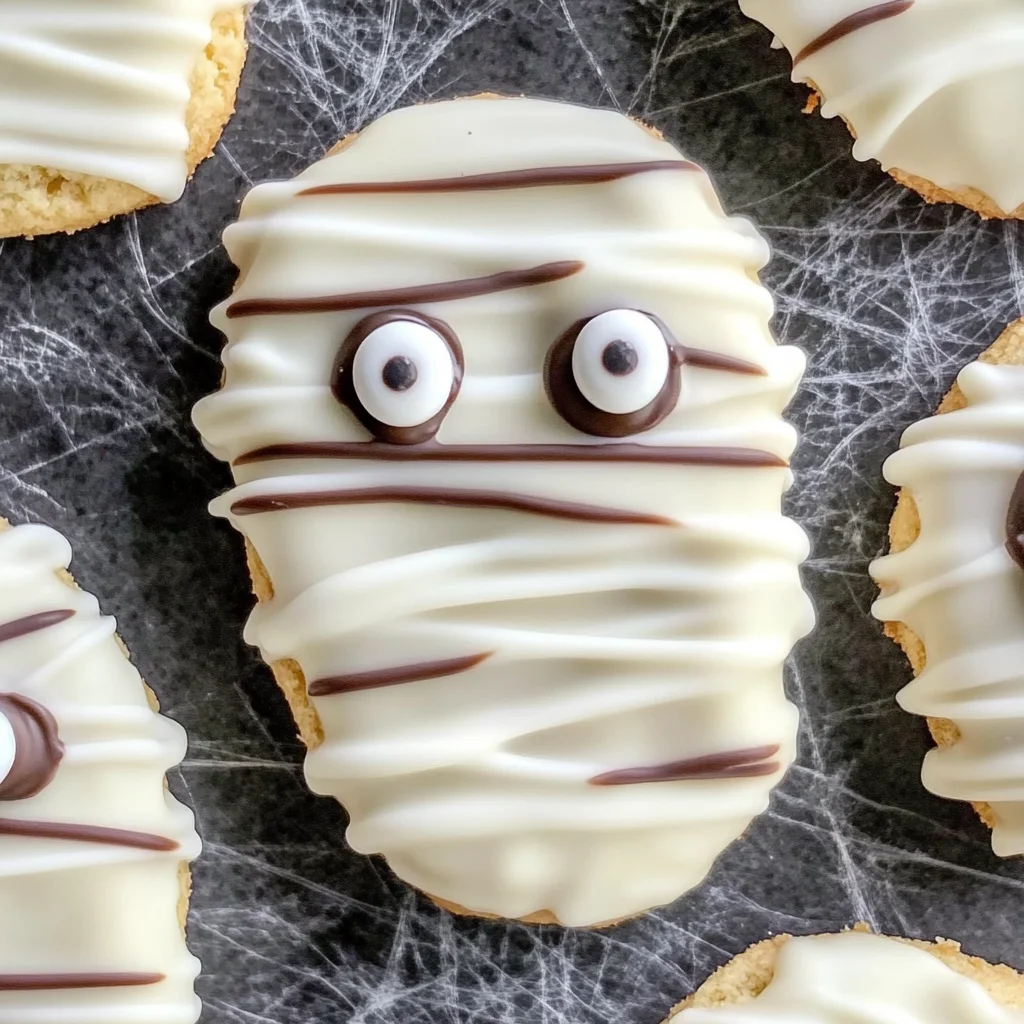
Step 4: Add Mummy Wrappings
Melt any remaining chocolate again if needed and drizzle it over your hardened cookies in a zigzag motion. This gives them that wrapped-up mummy appearance! Let everything set completely before serving.
Now you’ve got your very own batch of charming Nutter Butter Mummies! Enjoy sharing them with friends and family—they’re sure to bring smiles all around!
Pro Tips for Making Nutter Butter Mummies
Creating Nutter Butter Mummies is a delightful experience, and a few simple tips can make your treats even better!
-
Use high-quality chocolate: Opting for quality white chocolate chips will ensure a smoother melt and a richer flavor, making your mummies taste even more delicious.
-
Chill the cookies beforehand: Placing the Nutter Butter cookies in the fridge for about 15 minutes before dipping can help the chocolate set faster, preventing drips and ensuring a clean finish.
-
Experiment with toppings: Don’t hesitate to sprinkle some colorful edible sprinkles or drizzle colored melting chocolates on top of your mummies for an extra festive touch that adds both fun and flavor.
-
Keep the workspace organized: Having your ingredients and tools within reach and laying out all components before you start will make the process smoother and more enjoyable.
-
Involve the kids: Making these mummies is a fun activity for children! Let them help with placing the candy eyes or drizzling chocolate—it’s a great way to bond while creating something spooky together.
How to Serve Nutter Butter Mummies
Presenting Nutter Butter Mummies can be just as fun as making them! Here are some creative ideas to make your Halloween treat stand out at any gathering.
Garnishes
-
Edible glitter: A sprinkle of edible glitter can add a magical touch to your mummies, catching the light beautifully and enhancing their spooky charm.
-
Cocoa powder dusting: Lightly dusting with cocoa powder gives an earthy look that contrasts nicely with the white chocolate, resembling aged mummy wrappings.
Side Dishes
-
Pumpkin spice popcorn: This sweet and savory treat is perfect for nibbling alongside your mummies. The warm flavors of pumpkin spice complement the sweetness of the cookies beautifully.
-
Spooky fruit platter: Create a colorful spread with fruits like mandarin oranges (to resemble pumpkins), grapes (as eyeballs), and bananas cut into ghost shapes—this adds freshness and healthiness to balance out the sweets.
-
Monster smoothies: Blend together spinach, banana, and almond milk for a green smoothie that looks frightfully fun in clear cups. It’s nutritious and delicious, making it an excellent addition to your Halloween table.
With these tips and serving suggestions, your Nutter Butter Mummies will not only be cute but also set the stage for an unforgettable Halloween celebration! Enjoy crafting these delightful treats!
Make Ahead and Storage
Nutter Butter Mummies are not only a delightful treat, but they also lend themselves beautifully to meal prep! You can whip these up ahead of time for parties or as fun treats for the kids. Here’s how to store and keep your spooky snacks fresh.
Storing Leftovers
- Keep the Nutter Butter Mummies in an airtight container at room temperature.
- They will stay fresh for up to 3 days, perfect for enjoying throughout the Halloween season.
- Avoid refrigerating them, as this may cause the chocolate to lose its smooth texture.
Freezing
- If you want to make them well in advance, you can freeze the Nutter Butter Mummies.
- Place them in a single layer on a baking sheet and freeze until solid.
- Once frozen, transfer them to a freezer-safe container or zip-top bag, where they can be stored for up to 2 months.
Reheating
- Since these are coated in chocolate, reheating isn’t necessary and could alter their texture.
- Simply let them thaw in the fridge overnight if frozen, or enjoy directly from room temperature storage as they are!
FAQs
Here are some common questions about making Nutter Butter Mummies:
Can I use milk chocolate instead of white chocolate for Nutter Butter Mummies?
Absolutely! While this recipe features white chocolate for a classic mummy look, you can definitely switch it up with milk chocolate for a richer flavor. Just follow the same melting and dipping instructions!
How do I make my Nutter Butter Mummies look even scarier?
To amp up the spooky factor of your Nutter Butter Mummies, consider adding some edible decorations like sprinkles or using colored icing for extra details. Get creative with your design!
Are Nutter Butter Mummies suitable for kids with nut allergies?
Since Nutter Butters contain peanuts, they may not be suitable for children with nut allergies. You can explore alternative cookie options that are nut-free if needed.
How long does it take to make Nutter Butter Mummies?
These adorable treats are quick and easy! The total time is around 20 minutes, making them perfect for last-minute Halloween fun.
Final Thoughts
I hope you have as much fun making these Nutter Butter Mummies as I did! Their cute little faces and simple preparation method make them a standout treat at any Halloween gathering. Whether you’re serving them at a party or surprising your family with a festive snack, they’re sure to bring smiles all around. Enjoy every bite of these deliciously spooky delights, and happy baking!
Nutter Butter Mummies
If you’re searching for a delightful and festive treat to celebrate Halloween or just to add some fun to an ordinary day, Nutter Butter Mummies are the answer! These charming cookies are not only visually adorable but also incredibly easy to prepare. With just a handful of ingredients, you can create these spooky snacks in no time, perfect for a busy weeknight or a festive gathering. Watch as your family lights up with joy when they see these cute little mummies. Ideal for getting kids involved in the kitchen, this recipe is sure to be a hit!
- Prep Time: 10 minutes
- Cook Time: 10 minutes
- Total Time: 20 minutes
- Yield: 8 servings 1x
- Category: Dessert
- Method: No-Bake
- Cuisine: American
Ingredients
- 8 Nutter Butter Cookies
- 1 (12 oz) bag White Chocolate Chips
- 16 Candy Eyes
Instructions
- Prepare your workspace by laying parchment paper on your countertop.
- In a microwave-safe bowl, melt the white chocolate chips in short bursts, stirring in between until smooth.
- Fully coat each Nutter Butter cookie in melted chocolate and gently tap off the excess before placing them on parchment paper. Immediately add two candy eyes on each cookie.
- Drizzle any remaining melted chocolate over the cookies in a zigzag pattern to create mummy wrappings. Allow them to set completely before serving.
Nutrition
- Serving Size: 1 serving
- Calories: 150
- Sugar: 12g
- Sodium: 60mg
- Fat: 7g
- Saturated Fat: 4g
- Unsaturated Fat: 3g
- Trans Fat: 0g
- Carbohydrates: 20g
- Fiber: 1g
- Protein: 1g
- Cholesterol: 0mg