Halloween Chocolate Chip Cookies
If you’re looking for a delightful treat that captures the spirit of Halloween, you’ve come to the right place! These Halloween Chocolate Chip Cookies are not just any cookies; they’re fun, festive, and perfect for sharing with friends and family. Whether you’re hosting a spooky gathering or just want to brighten up a busy weeknight, this recipe will surely bring smiles all around. The adorable spider decorations add a playful touch that makes these cookies extra special.
I love making these cookies because they combine the classic comfort of chocolate chip cookies with a whimsical Halloween twist. Plus, they are easy enough for anyone to whip up, even if you’re not an experienced baker. So tie on your apron, and let’s get baking!
Why You’ll Love This Recipe
- Super Easy to Make: With simple steps and common ingredients, you’ll have these cookies ready in no time!
- Family-Friendly Fun: Kids will love helping shape the dough and decorating them with candy eyes.
- Perfect for Any Occasion: Whether it’s Halloween or just a cozy night at home, these cookies fit the bill.
- Make-Ahead Convenience: The dough can be made in advance and chilled overnight for fresh-baked goodness whenever you want.
- Deliciously Irresistible: Chewy, gooey, and bursting with chocolate chips – who could resist?
Ingredients You’ll Need
For this recipe, you’ll need some simple and wholesome ingredients that are likely already in your pantry. Gather these essentials to create your Halloween Chocolate Chip Cookies:
For the Cookies
- 2 1/4 cups all-purpose flour
- 1 teaspoon baking soda
- 1 teaspoon salt
- 1 cup (2 sticks) unsalted butter, at room temp
- 1/2 cup sugar
- 1 cup packed light brown sugar
- 1 1/2 teaspoons vanilla extract
- 2 large eggs
- 2 cups semisweet chocolate chips, plus more for topping
For Decoration
- Chocolate candy melts (See Kelly’s Notes)
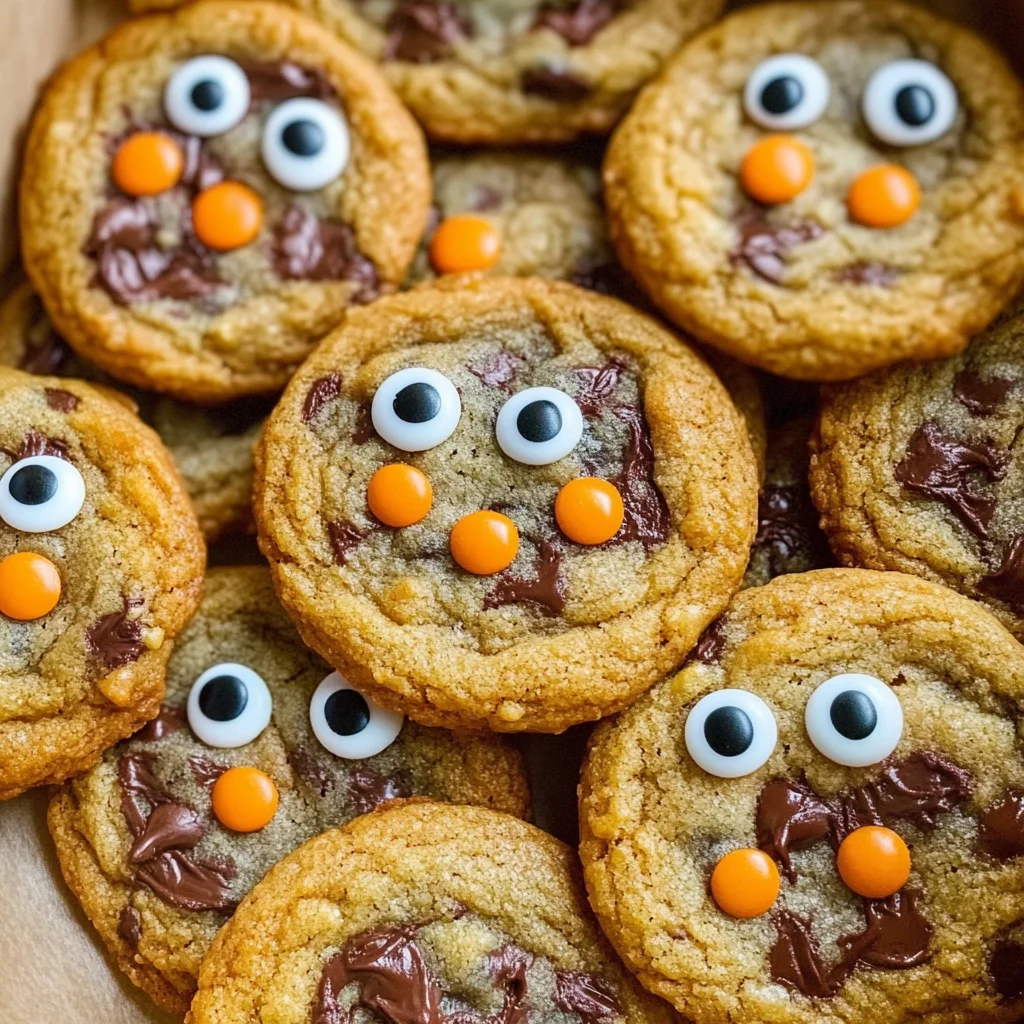
- Candy eyes
Variations
This recipe is wonderfully flexible! Feel free to mix things up based on your preferences or what you have on hand.
- Add Nuts: For a crunchy texture, mix in some chopped walnuts or pecans.
- Use Different Chips: Swap out semisweet chocolate chips for milk chocolate or white chocolate chips for a different flavor.
- Spice it Up: Add a pinch of cinnamon or nutmeg to give your cookies a warm autumn flavor.
- Decorate Differently: Instead of spiders, use seasonal sprinkles or colored icing to make them festive for any holiday!
How to Make Halloween Chocolate Chip Cookies
Step 1: Prepare the Dry Ingredients
In a medium bowl, whisk together the flour, baking soda, and salt. This step is important because it ensures that the leavening agents are evenly distributed throughout the flour. It sets up the base for perfectly textured cookies!
Step 2: Cream Together Wet Ingredients
In the bowl of a stand mixer fitted with the paddle attachment, cream together the butter, sugar, brown sugar, and vanilla extract until light and fluffy. This process incorporates air into your mixture which helps create those soft cookie edges we all love!
Step 3: Add Eggs and Dry Mixture
Add in the eggs one at a time while beating well between each addition. Once combined, gradually add the dry flour mixture until just incorporated. Be careful not to overmix here; we want tender cookies!
Step 4: Incorporate Chocolate Chips
Now it’s time to fold in those delicious chocolate chips! Beat gently until they are evenly distributed throughout the dough. Then cover and refrigerate the dough for at least two hours (or overnight) so it can firm up – this helps prevent spreading during baking.
Step 5: Bake Your Cookies
Preheat your oven to 375°F and line two baking sheets with parchment paper or Silpat mats. Scoop about 2 tablespoons of dough onto each sheet about 2 inches apart. Don’t forget to add extra chocolate chips on top as spider bodies!
Step 6: Cool Before Decorating
Bake your cookies for about 9 to 11 minutes until they’re set around the edges but still slightly underbaked in the center. Let them cool on the sheet for five minutes before transferring them to a rack to cool completely.
Step 7: Get Creative with Decoration
Once cooled, melt your chocolate candy melts according to package directions. Use this melted chocolate in a piping bag or plastic bag with a snipped corner to pipe spider legs coming from your cookie tops! Finally, place candy eyes above those choco-chip spider bodies using dots of melted chocolate.
Now serve these spooky treats at your next gathering – they’re sure to be a hit! Enjoy every bite of your Halloween Chocolate Chip Cookies!
Pro Tips for Making Halloween Chocolate Chip Cookies
Making these Halloween Chocolate Chip Cookies is not just about following the recipe—it’s also about adding your own personal touch! Here are some pro tips to ensure your cookies turn out perfectly delicious and delightfully spooky.
-
Chill the Dough: Refrigerating the dough for at least 2 hours helps the flavors meld together and prevents the cookies from spreading too much during baking, resulting in a thicker cookie.
-
Use Quality Chocolate Chips: Choosing high-quality semisweet chocolate chips enhances the flavor of your cookies. A rich chocolate taste will elevate your dessert and make it even more enjoyable.
-
Don’t Overbake: Keep an eye on your cookies while baking. They should be set around the edges but still slightly soft in the center. This ensures a chewy texture that everyone will love.
-
Experiment with Add-Ins: Feel free to mix in Halloween-themed add-ins like orange or purple sprinkles, or even chopped candy bars for a fun twist! These additions can make your cookies stand out and add extra sweetness.
-
Get Creative with Decorating: Once you’ve piped on those spider legs, let your imagination run wild! You can add other decorations like edible glitter or candy corn to give your cookies an even spookier look.
How to Serve Halloween Chocolate Chip Cookies
Presenting these Halloween Chocolate Chip Cookies can be just as much fun as making them! Here are some ideas to help you serve them up in style.
Garnishes
- Sprinkles: Add a sprinkle of festive colored sprinkles (like orange and black) over the top of the cookies right before serving for an extra pop of color.
- Whipped Coconut Cream: For a dairy-free option, serve with a dollop of whipped coconut cream on the side. It adds a light, fluffy texture that balances nicely with the rich chocolate.
- Chocolate Drizzle: A simple drizzle of melted dark chocolate over the cooled cookies can create an elegant presentation while enhancing their chocolaty goodness.
Side Dishes
- Pumpkin Spice Latte: Warm up with a homemade pumpkin spice latte—its creamy richness pairs perfectly with the sweetness of your cookies.
- Apple Cider: Serve warm apple cider alongside these cookies for a comforting autumn treat that complements their flavors beautifully.
- Vanilla Ice Cream: A scoop of vanilla ice cream adds creaminess and contrasts with the chewy texture of the cookies, making for an indulgent dessert experience.
- Fruit Platter: Fresh fruit like apples or pears not only provides a refreshing balance to the sweetness but also adds a colorful touch to your dessert spread.
With these tips and serving suggestions, you’ll have everything you need to impress your family and friends with delightful Halloween Chocolate Chip Cookies. Happy baking!

Make Ahead and Storage
These Halloween Chocolate Chip Cookies are perfect for meal prep! You can easily make them ahead of time, ensuring you have a delightful treat ready for your spooky celebrations.
Storing Leftovers
- Store the cookies in an airtight container at room temperature.
- They will stay fresh for up to one week.
- For longer storage, consider refrigerating them in a sealed container.
Freezing
- Allow the cookies to cool completely before freezing.
- Place them in a single layer on a baking sheet to freeze for about an hour.
- Once frozen, transfer the cookies to a freezer-safe bag or container, separating layers with parchment paper.
- They can be stored in the freezer for up to three months.
Reheating
- To enjoy warm cookies, preheat your oven to 350°F (175°C).
- Place the cookies on a baking sheet and heat for about 5-7 minutes until warmed through.
- Alternatively, microwave individual cookies for about 10-15 seconds.
FAQs
Here are some common questions regarding Halloween Chocolate Chip Cookies.
Can I use different types of chocolate chips in my Halloween Chocolate Chip Cookies?
Absolutely! Feel free to mix and match with milk chocolate, dark chocolate, or even white chocolate chips. Each will add its unique flavor twist!
How do I ensure my Halloween Chocolate Chip Cookies turn out perfectly?
To achieve the best results, make sure to accurately measure your ingredients and chill your dough as instructed. This helps develop flavor and texture!
Can I make these Halloween Chocolate Chip Cookies gluten-free?
Yes! You can substitute all-purpose flour with a gluten-free flour blend. Just ensure that your other ingredients are also gluten-free.
What decorations can I use besides candy eyes for my Halloween Chocolate Chip Cookies?
You can get creative! Consider using colorful sprinkles or icing to add spooky designs. Use your imagination to make these cookies even more festive!
Final Thoughts
I hope you find joy in baking these Halloween Chocolate Chip Cookies! They’re not only delicious but also fun to decorate, making them perfect for any gathering. Enjoy making memories in the kitchen as you create these spooky treats, and don’t forget to share them with friends and family. Happy baking!
Halloween Chocolate Chip Cookies

Indulge in the spirit of Halloween with these delightful Halloween Chocolate Chip Cookies! Soft, chewy, and packed with rich chocolate chips, these cookies are perfect for sharing at festive gatherings or enjoying on a cozy night. The whimsical spider decorations add a playful touch, making them a hit with kids and adults alike. Easy to make and customize, this recipe is an excellent way to create memories in the kitchen while embracing the spooky season. Get ready to impress your friends and family with these festive treats!
- Prep Time: 15 minutes
- Cook Time: 10 minutes
- Total Time: 25 minutes
- Yield: Approximately 24 cookies 1x
- Category: Dessert
- Method: Baking
- Cuisine: American
Ingredients
- 2 1/4 cups all-purpose flour
- 1 teaspoon baking soda
- 1 teaspoon salt
- 1 cup unsalted butter (room temperature)
- 1/2 cup sugar
- 1 cup packed light brown sugar
- 1 1/2 teaspoons vanilla extract
- 2 large eggs
- 2 cups semisweet chocolate chips (plus more for topping)
- Chocolate candy melts (for decoration)
- Candy eyes
Instructions
- Preheat oven to 375°F (190°C) and line baking sheets with parchment paper.
- In a bowl, whisk together flour, baking soda, and salt.
- In a stand mixer, cream together butter, sugar, brown sugar, and vanilla until light and fluffy.
- Add eggs one at a time, mixing well after each addition. Gradually incorporate dry ingredients until just combined.
- Fold in chocolate chips. Chill dough for at least two hours.
- Scoop about two tablespoons of dough onto baking sheets spaced two inches apart. Top with extra chocolate chips.
- Bake for 9-11 minutes until set around edges but still soft in center. Cool before decorating.
Nutrition
- Serving Size: 1 cookie
- Calories: 150
- Sugar: 10g
- Sodium: 90mg
- Fat: 7g
- Saturated Fat: 4g
- Unsaturated Fat: 3g
- Trans Fat: 0g
- Carbohydrates: 20g
- Fiber: 1g
- Protein: 2g
- Cholesterol: 20mg