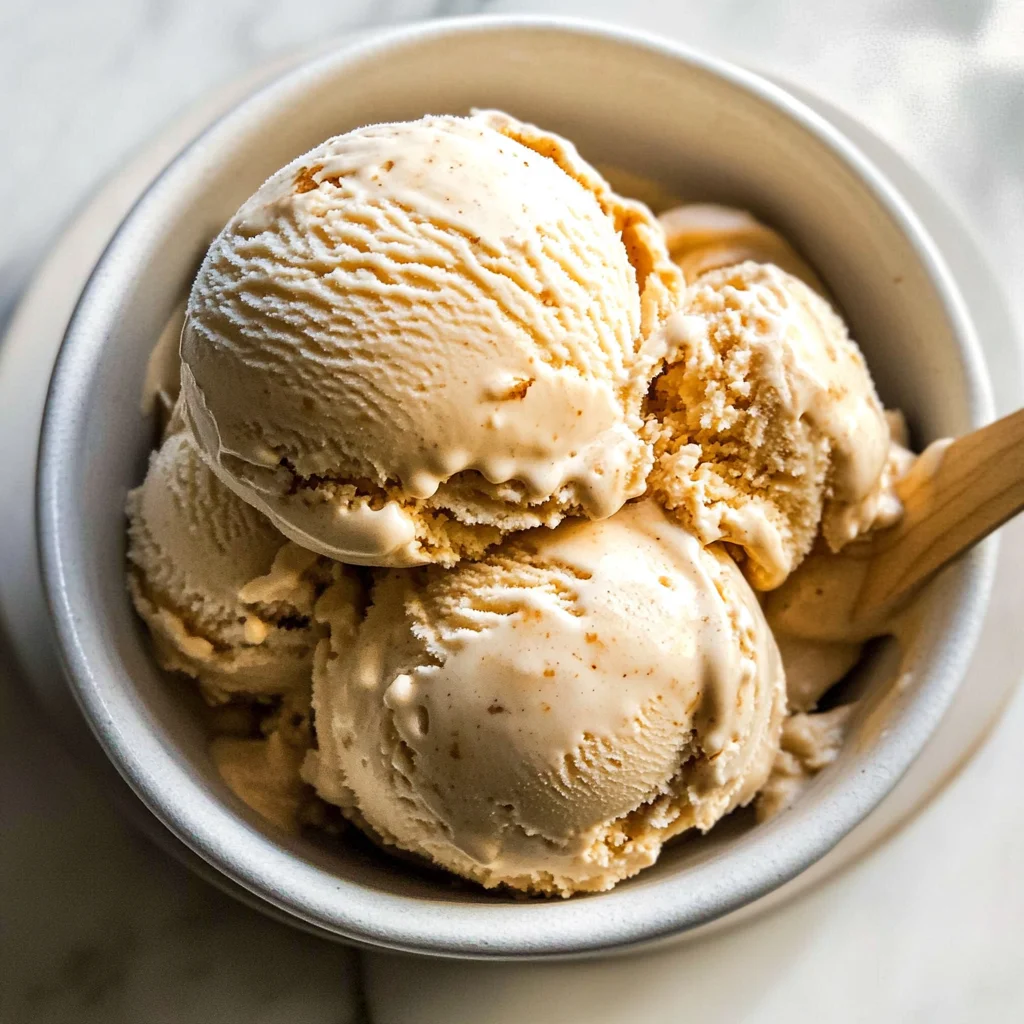
Homemade Maple Ice Cream
If you’re looking for a treat that’s both indulgent and comforting, then you’ve stumbled upon a gem: Homemade Maple Ice Cream. This delightful dessert is not only creamy and rich but also brings with it a touch of warmth from the maple flavor that makes every scoop feel like a hug in a bowl. It’s perfect for everything from busy weeknights to family gatherings, offering an easy way to impress your loved ones without spending all day in the kitchen.
What makes this ice cream extra special is its versatility. It pairs beautifully with so many desserts, particularly apple crisp, but can stand alone as a sweet delight too. Trust me, once you try this recipe, it will become one of your go-to favorites!
Why You’ll Love This Recipe
- Easy to Make: With just a few simple steps, you can whip up this delicious ice cream without any fuss.
- Family-Friendly: Kids and adults alike will love the creamy texture and sweet maple flavor.
- Make-Ahead Convenience: Prepare it ahead of time for parties or just to enjoy during the week!
- Versatile Pairing: Enjoy it on its own or pair it with your favorite desserts like pies or crumbles.
Ingredients You’ll Need
To create this delightful Homemade Maple Ice Cream, you’ll need some simple and wholesome ingredients that are easy to find. Each ingredient plays an important role in achieving that silky-smooth texture and delicious maple flavor.
For the Custard Base
- 6 egg yolks
- 3/4 cup maple syrup (Grade B, see notes)
- 1 tsp arrowroot (tapioca starch, or cornstarch)
- 1/4 tsp sea salt
- 1 1/2 cups half and half
- 1 1/2 cups heavy cream
- 1 tsp vanilla extract
Variations
This Homemade Maple Ice Cream recipe is wonderfully flexible. Here are a few ideas to customize it just for you!
- Add Some Crunch: Stir in chopped nuts like pecans or walnuts right before freezing for an added texture.
- Mix in Chocolate Chips: For a sweet contrast, fold in some dark chocolate chips after the custard cools.
- Try Different Syrups: Experiment with other flavored syrups like caramel or hazelnut for a fun twist.
- Infuse with Spices: A pinch of cinnamon or nutmeg can add an extra layer of warmth to your ice cream.
How to Make Homemade Maple Ice Cream
Step 1: Whisk the Egg Mixture
Start by whisking together the egg yolks, maple syrup, arrowroot, and sea salt. This step is crucial because the egg yolks provide richness while the arrowroot helps thicken our ice cream base.
Step 2: Combine with Half and Half
Next, whisk the half and half into your egg mixture. Cook over medium-high heat while whisking continuously until the mixture thickens slightly but doesn’t boil. This gentle cooking process helps create that velvety custard base we all adore.
Step 3: Incorporate Cream and Vanilla
Once thickened, take your pan off the heat and whisk in the heavy cream and vanilla extract. This gives our ice cream its creamy texture while enhancing the flavor profile with that lovely vanilla note.
Step 4: Strain and Chill
Pour your mixture through a strainer to remove any bits that may have formed during cooking. Chill the custard in the refrigerator for at least 4 hours; this step is essential for developing flavors and ensuring a smooth final product.
Step 5: Freeze the Ice Cream
Now comes the fun part! Freeze your chilled custard according to your ice cream maker’s instructions. The ice cream will be ready when it stands up on a spoon—this means it’s perfectly creamy!
Step 6: Final Freeze
After churning, transfer your ice cream into a container and place it in the freezer for an additional 4-6 hours. This final freeze allows your Homemade Maple Ice Cream to firm up nicely so you can scoop it out easily.
And there you have it—a delightful treat that’s sure to bring smiles!
Pro Tips for Making Homemade Maple Ice Cream
Making homemade ice cream is a delightful experience, and with a few pro tips, you can elevate your maple ice cream to the next level!
-
Use Grade B Maple Syrup: This type of syrup has a richer flavor, which enhances the overall taste of your ice cream. It brings out that warm, cozy maple essence without being overly sweet.
-
Chill Your Ingredients: Before you begin, make sure your half and half and heavy cream are well-chilled. This helps the custard thicken more efficiently and results in a smoother texture.
-
Don’t Rush the Cooking Process: Take your time while cooking the custard. Whisk continuously over medium-high heat until it thickens; this prevents curdling and ensures a creamy base.
-
Strain the Mixture: Straining the custard before chilling removes any coagulated bits of egg, giving you a silky-smooth ice cream that’s irresistible.
-
Allow It to Freeze Fully: After churning, let your ice cream firm up in the freezer for 4-6 hours. This step is essential to achieve that perfect scoopable consistency.
How to Serve Homemade Maple Ice Cream
Serving homemade maple ice cream is all about creativity and personal flair! Here are some fun ways to present this delicious dessert.
Garnishes
- Chopped Nuts: Sprinkle some toasted pecans or walnuts on top for added crunch and flavor contrast.
- Caramel Sauce: Drizzle warm caramel sauce over each scoop to enhance the sweetness and add a gooey texture.
- Fresh Berries: Add some blueberries or raspberries for a pop of color and tartness that complements the sweet maple flavor beautifully.
Side Dishes
- Apple Crisp: The warm, spiced flavors of apple crisp create a delightful contrast with the cold, creamy maple ice cream. A perfect pairing!
- Ginger Snap Cookies: These cookies provide a spicy crunch that balances out the smoothness of the ice cream wonderfully.
- Chocolate Chip Cookies: Who can resist classic chocolate chip cookies? They add a chewy texture that pairs perfectly with the silky maple ice cream.
- Pecan Pie: The nutty richness of pecan pie alongside your creamy dessert makes for an indulgent treat that’s sure to impress.
Now that you have all these serving ideas, it’s time to dig in! Enjoy your homemade maple ice cream as a delightful ending to any meal or simply as an afternoon treat. Happy scooping!

Make Ahead and Storage
This Homemade Maple Ice Cream is perfect for meal prep! You can make it ahead of time and store it for those sweet cravings or special occasions. Here’s how to keep your delicious creation fresh and ready to enjoy.
Storing Leftovers
- Store any leftover ice cream in an airtight container to prevent ice crystals from forming.
- For best quality, consume within two weeks.
- If you notice the ice cream becoming hard, let it sit at room temperature for a few minutes before scooping.
Freezing
- Once you’ve made your ice cream, be sure to transfer it to a freezer-safe container for optimal storage.
- Keep the container tightly sealed to maintain freshness and avoid freezer odors.
- Label the container with the date you made it, so you can keep track of its freshness.
Reheating
- This step isn’t necessary since ice cream is served frozen!
- However, if your ice cream becomes too hard, simply let it sit at room temperature for about 5-10 minutes before serving.
- Avoid using a microwave as it can alter the texture of your homemade maple ice cream.
FAQs
Here are some common questions you might have about making this delightful treat!
Can I use different types of syrup instead of maple?
While this recipe is specifically for Homemade Maple Ice Cream, you can experiment with other syrups like agave or honey. Just keep in mind that the flavor will change!
How do I achieve the best texture for my Homemade Maple Ice Cream?
To ensure a creamy texture, make sure to whisk continuously while cooking the custard and chill the mixture thoroughly before churning in your ice cream machine. The chilling step is essential!
What if I don’t have an ice cream machine?
No worries! You can still make this Homemade Maple Ice Cream by pouring the chilled mixture into a shallow dish and placing it in the freezer. Stir every 30 minutes until it’s fully frozen and creamy.
How long does Homemade Maple Ice Cream last in the freezer?
Homemade Maple Ice Cream can last up to two weeks in the freezer when stored properly in an airtight container.
Final Thoughts
I hope you’re as excited as I am to dive into this rich and creamy Homemade Maple Ice Cream! It’s such a simple yet indulgent dessert that brings joy to any occasion. Enjoy making this recipe with your family and friends—there’s nothing quite like sharing sweet moments together. Happy scooping!
Homemade Maple Ice Cream
Indulge in the creamy delight of Homemade Maple Ice Cream, a dessert that combines warmth and comfort in every scoop. This rich treat is perfect for any occasion, whether it’s a cozy family night or a festive gathering. The deep maple flavor creates a deliciously silky texture that will make this ice cream a staple in your dessert repertoire. Plus, it’s simple to prepare and can be made ahead of time, allowing you to impress loved ones without spending hours in the kitchen. Best of all, this recipe is adaptable—pair it with your favorite desserts or enjoy it on its own for a refreshing sweet treat.
- Prep Time: 20 minutes
- Cook Time: 15 minutes
- Total Time: 35 minutes
- Yield: Approximately 6 servings 1x
- Category: Dessert
- Method: Churning
- Cuisine: American
Ingredients
- 6 egg yolks
- 3/4 cup maple syrup (Grade B)
- 1 tsp arrowroot (or tapioca starch/cornstarch)
- 1/4 tsp sea salt
- 1 1/2 cups half and half
- 1 1/2 cups heavy cream
- 1 tsp vanilla extract
Instructions
- In a bowl, whisk together egg yolks, maple syrup, arrowroot, and sea salt until smooth.
- Gradually mix in the half and half. Cook over medium-high heat while whisking continuously until slightly thickened but not boiling.
- Remove from heat and stir in heavy cream and vanilla extract until well combined.
- Strain the mixture to eliminate any lumps and chill in the refrigerator for at least 4 hours.
- Freeze the chilled custard according to your ice cream maker's instructions until creamy.
- Transfer to an airtight container and freeze for an additional 4-6 hours to firm up before serving.
Nutrition
- Serving Size: 1/2 cup (120g)
- Calories: 305
- Sugar: 30g
- Sodium: 66mg
- Fat: 20g
- Saturated Fat: 12g
- Unsaturated Fat: 8g
- Trans Fat: 0g
- Carbohydrates: 29g
- Fiber: <1g
- Protein: 3g
- Cholesterol: 223mg