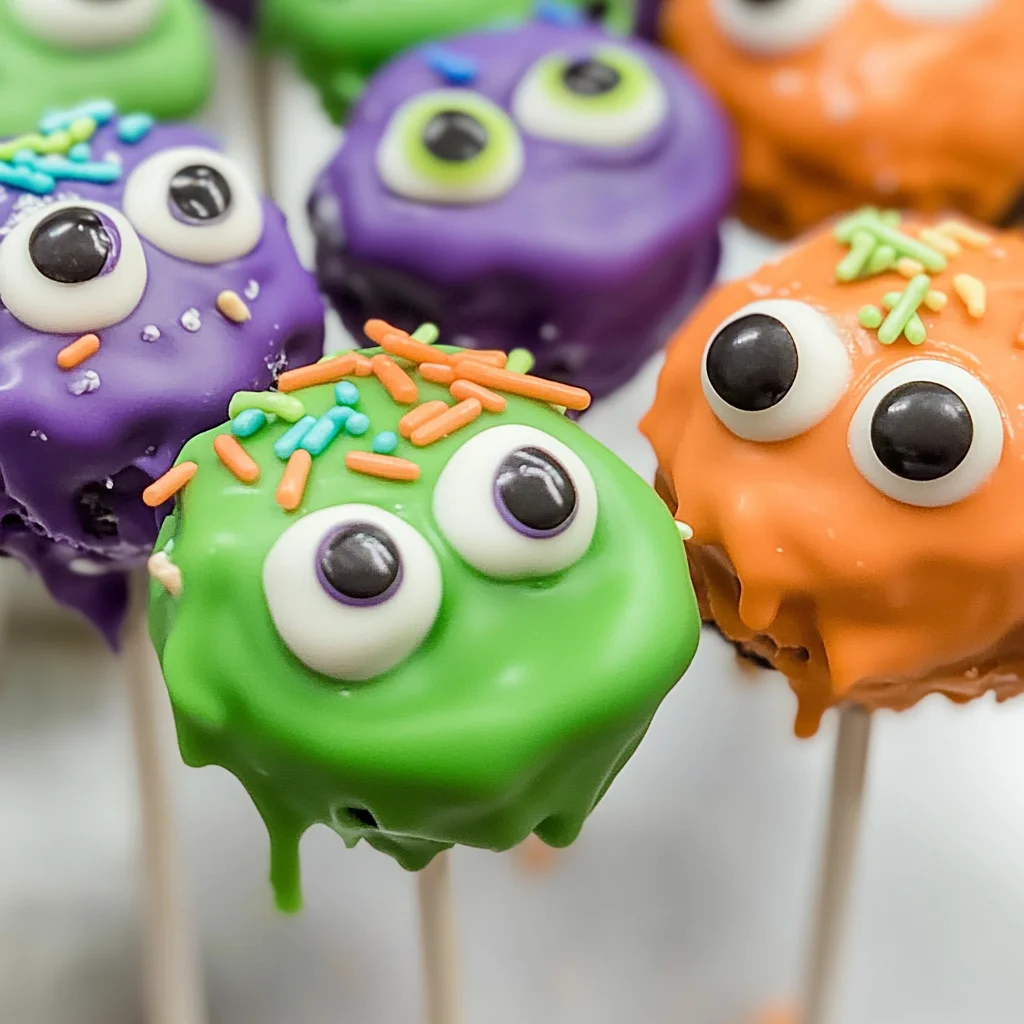
Monster Oreo Pops
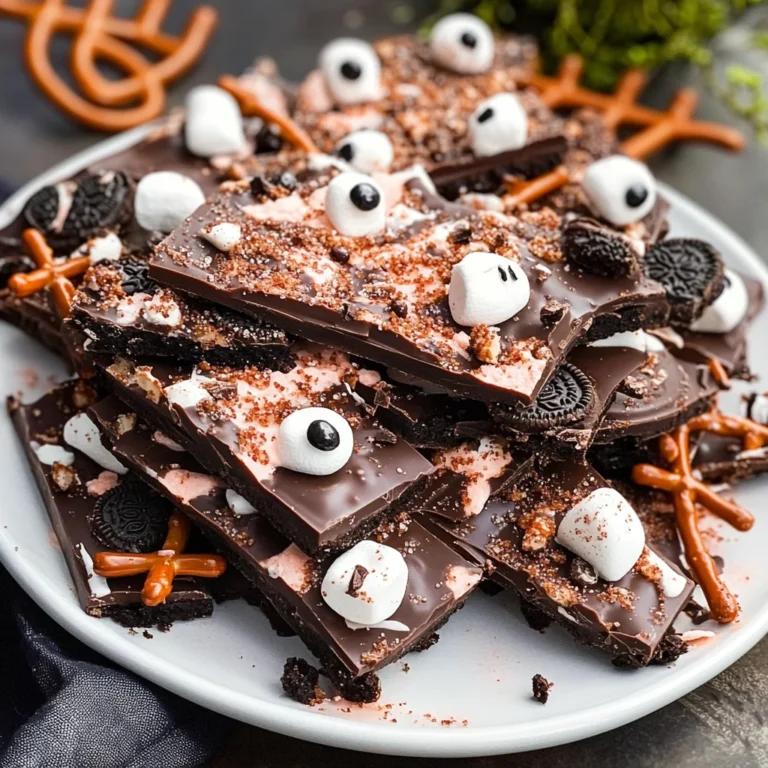
If you’re looking for a fun and festive treat, these Monster Oreo Pops are just the ticket! Perfect for Halloween parties, family gatherings, or simply a sweet surprise for the kids, these delightful pops are not only easy to make but also a blast to decorate. With their vibrant colors and playful designs, they bring a smile to everyone’s face. Plus, who can resist the combination of creamy Oreos and colorful candy melts? This recipe is truly special because it invites creativity—let your imagination run wild as you create your very own monsters!
Why You’ll Love This Recipe
- No-Bake Fun: These Monster Oreo Pops require no baking, making them quick and simple to whip up even on busy days.
- Family-Friendly: Kids love getting involved in decorating their own monster pops—it’s the perfect way to bond over a sweet treat!
- Endless Creativity: With various colors and toppings, you can customize each pop to match your favorite designs or themes.
- Make Ahead: Prepare these treats in advance and store them in the fridge until you’re ready to serve—perfect for party planning!
- Deliciously Sweet: The combination of crunchy Oreos and smooth candy melts creates a yummy dessert that satisfies any sweet tooth.
Ingredients You’ll Need
To make these Monster Oreo Pops, you’ll need some simple, wholesome ingredients that you might already have in your pantry. Gather everything listed below, and let’s get started!
- 24 Double Stuffed Oreos
- ½ cup white chocolate melting wafers
- 12 ounces green candy melts
- 12 ounces purple candy melts
- 12 ounces orange candy melts
- 3 Tablespoons Crisco shortening (divided)
- Green, purple, and orange jimmy sprinkles (long not round)
- Candy eyes (multiple sizes)
- 24 Cake pop sticks
Variations
This recipe is wonderfully adaptable! Feel free to mix it up with these fun ideas:
- Change Up the Cookies: Use different flavors of Oreos—like mint or peanut butter—for a unique twist on flavor.
- Add Layers of Flavor: Try drizzling melted chocolate over the pops after dipping for added richness.
- Sprinkle Surprise: Experiment with different types of sprinkles or edible glitter for an extra festive touch.
- Theme It Up: Customize your pops for holidays or birthdays using colored melts that match your theme.
How to Make Monster Oreo Pops
Step 1: Prepare the Cake Pop Sticks
Take each cake pop stick and gently poke a hole about ½ inch deep into the Oreo filling. Be careful here — we want to avoid breaking those delicious wafers. Just remember not to leave the stick inside; we’ll be adding some fun decorations soon!
Step 2: Melt the White Chocolate
In a small microwave-safe bowl, add your white chocolate melting wafers. Heat them on 50% power for one minute. After that, give them a stir and return them to the microwave in additional 30-second bursts until they’re silky smooth. This step is key because it will help secure our cake pop sticks into place.
Step 3: Insert the Sticks
Dip the tip (about ½ inch) of each cake pop stick into that melted white chocolate. Then gently place it into the hole you made earlier in each Oreo. Let them rest until the chocolate hardens; this ensures the sticks stay put when we dip them later.
Step 4: Melt Colored Candy Melts
Now it’s time for color! In small microwave-safe containers (glass tumblers work wonders), add your green, purple, and orange candy melts. Heat them on defrost mode or at 50% power for one minute, stirring with a fork as needed. Don’t forget to add one tablespoon of Crisco to each; this helps achieve that perfect dipping consistency.
Step 5: Dip Your Oreos
Carefully dip each Oreo into your melted candy melts until completely covered. You might need to wiggle it side-to-side so all sides are coated well. Allow any excess chocolate to drip off before moving on.
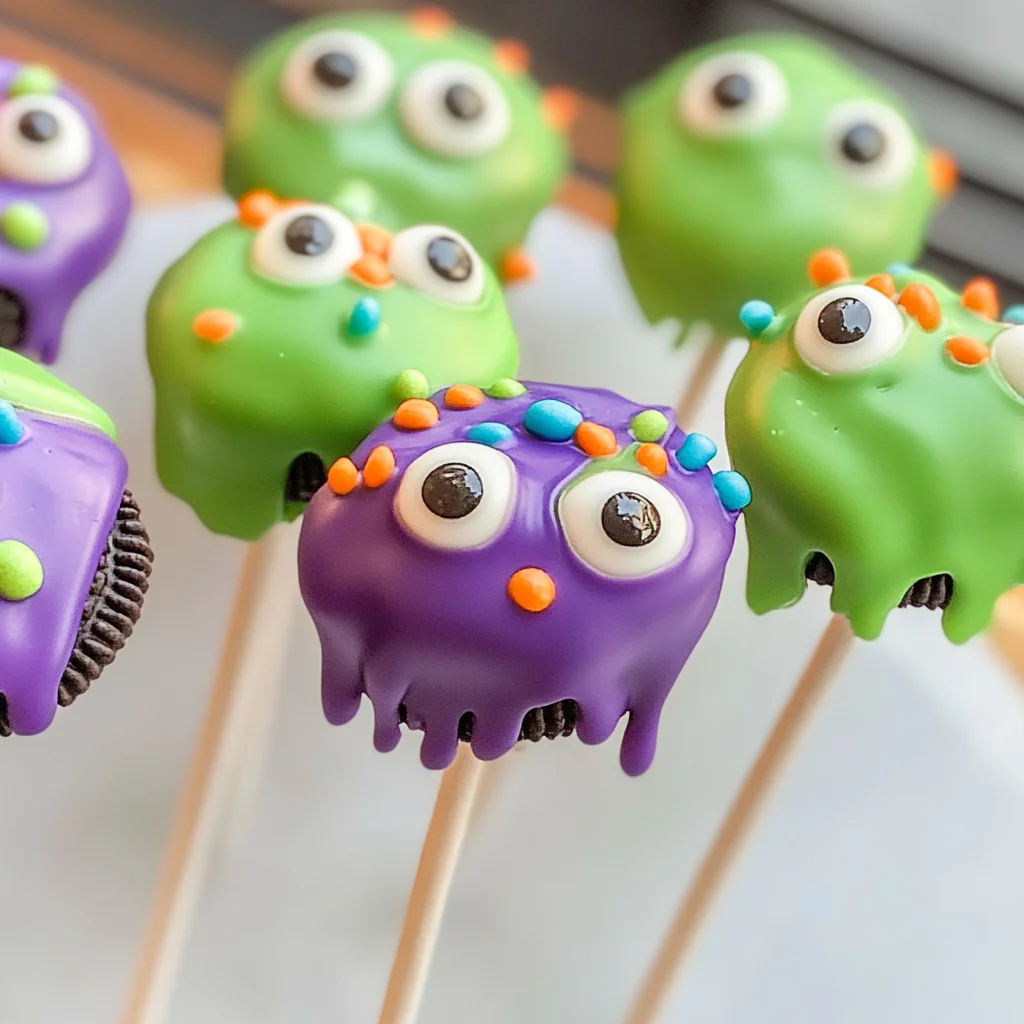
Step 6: Decorate Your Monsters
This is where the fun really begins! Immediately add sprinkles and candy eyes onto each Monster pop while the chocolate is still wet. Get creative with how you place those eyes—there’s no wrong way to make your monsters uniquely yours!
Step 7: Chill Before Serving
Finally, allow those adorable monster pops to rest upright in a cake pop stand or any container while they chill in the refrigerator for about 30 minutes. This will set everything nicely before you share these treats with friends and family.
Now you’re all set! Enjoy creating these delightful Monster Oreo Pops—they’re sure to be a hit!
Pro Tips for Making Monster Oreo Pops
Creating these delightful Monster Oreo Pops is not only fun but also a fantastic way to impress family and friends. Here are some tips to ensure your treats turn out perfectly!
-
Choose the right melting wafers: Using high-quality melting wafers will give you a smoother finish and better taste. They melt more uniformly, making your pops look professional.
-
Be patient with the chocolate: Heating the chocolate slowly prevents it from seizing. Stirring in between heating intervals ensures a silky texture that’s perfect for dipping.
-
Experiment with designs: Let your creativity shine! Use different sprinkles and arrange the candy eyes in various patterns to create unique monster faces that reflect your style.
-
Keep pops upright while cooling: Resting your pops upright prevents them from sticking to surfaces and maintains their shape. A cake pop stand or even a block of Styrofoam works wonders here!
-
Make it a family activity: Involve kids or friends in the decorating process. It’s a great way to bond and adds an element of fun to your baking experience.
How to Serve Monster Oreo Pops
When it comes time to present your Monster Oreo Pops, think about creating a spooky yet festive atmosphere that complements these adorable treats.
Garnishes
- Edible glitter: A sprinkle of edible glitter will add an enchanting sparkle to your Monster Oreo Pops, making them even more eye-catching.
- Whipped coconut cream: A dollop of whipped coconut cream on the side gives a creamy contrast that balances out the sweetness of the pops.
Side Dishes
- Fruit skewers: Colorful fruit skewers made with seasonal fruits can provide a refreshing contrast to the sweet pops. Plus, they add a vibrant touch to your table!
- Veggie platter: Pairing with a crisp veggie platter offers a healthy crunch, creating a delightful balance between sweet and savory.
- Pumpkin spice popcorn: This seasonal treat brings in those fall flavors! The sweetness and crunch make it an excellent companion for your Monster Oreo Pops.
- Hot chocolate bar: Create an inviting hot chocolate station with various toppings like marshmallows, whipped cream, and flavored syrups for an extra cozy treat option alongside your pops.
Now that you have all the tips and serving suggestions, it’s time to embrace the Halloween spirit and get crafting those delightful Monster Oreo Pops! Enjoy every bite!
Make Ahead and Storage
These Monster Oreo Pops are perfect for meal prep, making them an excellent choice for parties or Halloween gatherings. You can easily prepare them in advance, allowing the flavors to meld beautifully while saving you time on the big day.
Storing Leftovers
- Store any leftover Monster Oreo Pops in an airtight container.
- Keep them in the refrigerator for up to one week.
- Avoid stacking them directly on top of each other to prevent damage to the decorations.
Freezing
- These Oreo pops can be frozen if you want to prepare them well ahead of time.
- Place them in a single layer on a baking sheet until frozen solid.
- Transfer them to a freezer-safe bag or container, separating layers with parchment paper.
- They can be frozen for up to two months.
Reheating
- There’s no need to reheat these pops; they’re best enjoyed cold!
- Simply take them out of the fridge or freezer and let them sit for a few minutes before serving for optimal taste and texture.
FAQs
Here are some common questions about making Monster Oreo Pops:
Can I substitute different candies for the Monster Oreo Pops?
Absolutely! Feel free to use different colors of candy melts or other fun toppings like crushed nuts or edible glitter to customize your monster treats!
How long do Monster Oreo Pops last?
When stored properly in an airtight container in the refrigerator, your Monster Oreo Pops will stay fresh for up to one week.
What is the best way to decorate Monster Oreo Pops?
The best way is to dip them in melted candy melts and immediately sprinkle with colorful jimmies and candy eyes. Get creative—there’s no wrong way!
Can I make Monster Oreo Pops ahead of time?
Yes! These delicious treats can be made ahead of time. You can prepare and decorate them a few days before your event, just make sure to store them properly.
Final Thoughts
I hope you find joy in making these delightful Monster Oreo Pops! They’re not only easy and fun but also a fantastic treat that brings smiles all around, especially during Halloween festivities. Enjoy crafting these colorful goodies, and don’t hesitate to experiment with different designs—after all, each pop can be as unique as you are! Happy baking!
Monster Oreo Pops

Indulge your creativity this Halloween with these delightful Monster Oreo Pops! These no-bake treats are not only easy to prepare but also provide endless opportunities for decorating fun. Perfect for parties, family gatherings, or as a sweet surprise for kids, these colorful pops combine the rich taste of creamy Oreos with vibrant candy melts. Each pop can be customized into a unique monster design that will surely bring smiles to faces of all ages.
- Prep Time: 30 minutes
- Cook Time: N/A
- Total Time: 0 hours
- Yield: Makes 24 servings 1x
- Category: Dessert
- Method: No-Bake
- Cuisine: American
Ingredients
- 24 Double Stuffed Oreos
- ½ cup white chocolate melting wafers
- 12 ounces green candy melts
- 12 ounces purple candy melts
- 12 ounces orange candy melts
- 3 Tablespoons Crisco shortening (divided)
- Green, purple, and orange jimmy sprinkles
- Candy eyes (multiple sizes)
- 24 cake pop sticks
Instructions
- Prepare each cake pop stick by gently inserting it about ½ inch into the Oreo filling without breaking the cookie.
- Melt white chocolate melting wafers in the microwave at 50% power until smooth; dip the tip of each stick into this chocolate before inserting it into the Oreo.
- In separate bowls, melt the green, purple, and orange candy melts with one tablespoon of Crisco each until silky.
- Dip each Oreo into the melted candy melts, allowing excess to drip off.
- While still wet, decorate with sprinkles and candy eyes to create your monster designs.
- Chill in the refrigerator for about 30 minutes until set.
Nutrition
- Serving Size: 1 serving
- Calories: 180
- Sugar: 15g
- Sodium: 40mg
- Fat: 8g
- Saturated Fat: 4g
- Unsaturated Fat: 3g
- Trans Fat: 0g
- Carbohydrates: 27g
- Fiber: 1g
- Protein: 1g
- Cholesterol: 0mg